Getting Started
Prerequisites
- Docker (recommended) or Rust 1.85+ with Node.js 22+
Docker Setup (recommended)
bash
# Pull the image
docker pull ghcr.io/codecoradev/trapfall:latest

# Run with persistent data
docker run -d \
  --name trapfall \
  -p 3000:3000 \
  -v trapfall-data:/data \
  -e TRAPFALL_SECURE_COOKIE=false \
  ghcr.io/codecoradev/trapfall:latest \
  --db /data/trapfall.db serve --listen 0.0.0.0:3000
Or with Docker Compose:
bash
git clone https://github.com/codecoradev/trapfall.git
cd trapfall
docker compose up -d
Setup Wizard
- Open
http://localhost:3000in your browser - The setup wizard appears on first run
- Create your admin account (email, name, password)
- A default project is created automatically with a DSN
- Click "Go to Dashboard" — you're automatically logged in

First Look
After setup, you'll land on the Issues page showing your default project:

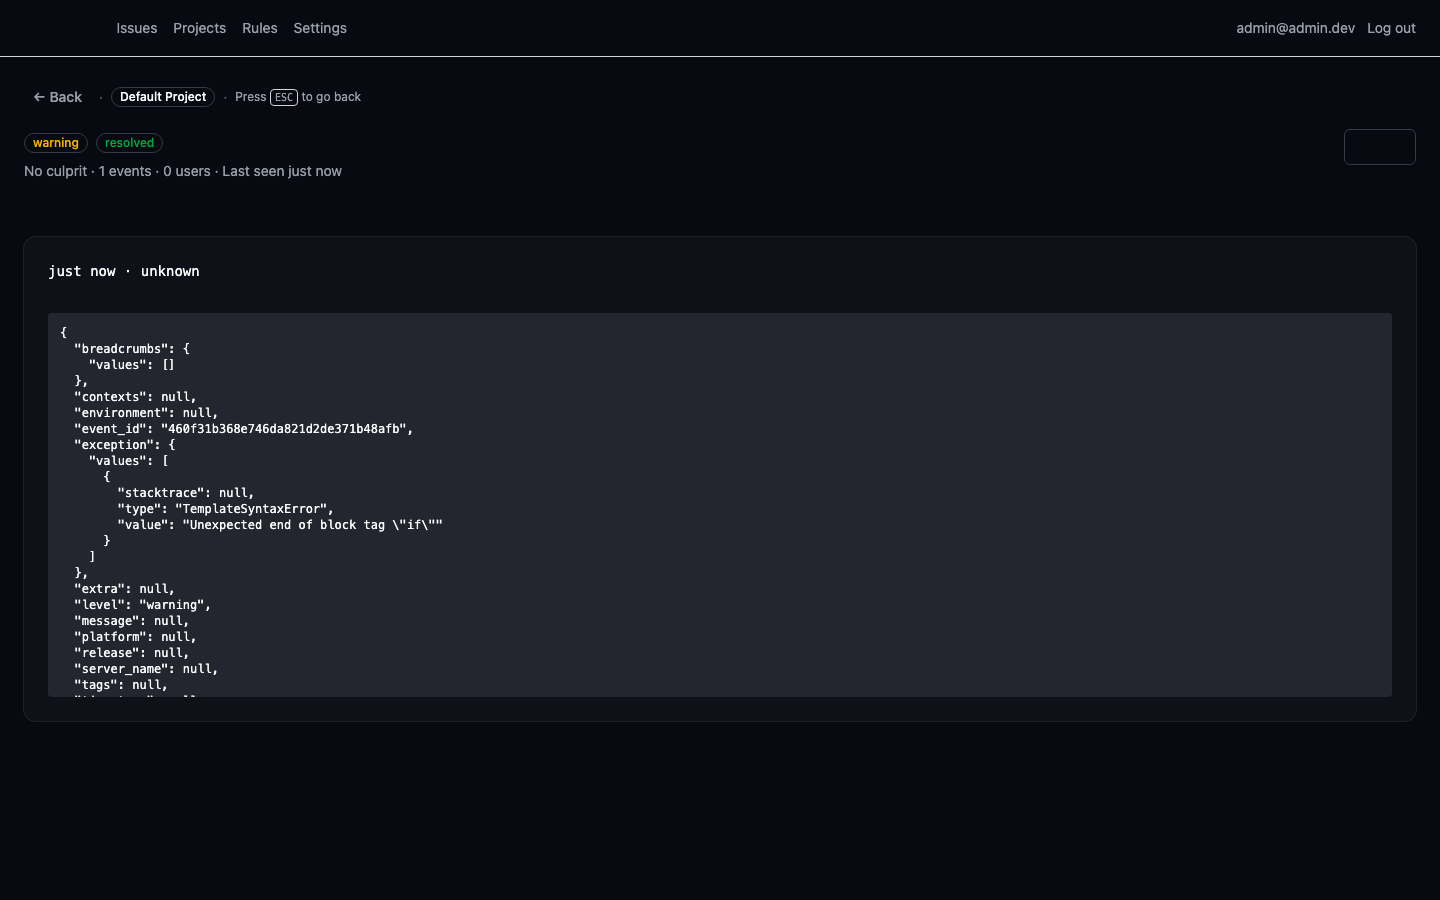
Click any issue to see full details, stack trace, and event history:
Integrate with Your App
Use the DSN with any Sentry SDK:
js
// JavaScript / Node.js
Sentry.init({ dsn: "https://<key>@your-server:3000/<project_id>" });
python
# Python
import sentry_sdk
sentry_sdk.init(dsn="https://<key>@your-server:3000/<project_id>")
rust
// Rust
sentry::init(("https://<key>@your-server:3000/<project_id>", sentry::ClientOptions::default()));
dart
// Flutter / Dart
await SentryFlutter.init((options) => {
  options.dsn = "https://<key>@your-server:3000/<project_id>",
});
Verify
Trigger a test error in your app, then check the TrapFall dashboard — the error appears in real-time on the Issues page.
From Source
bash
# Build frontend
cd web
npm ci
npm run build
cd ..

# Run
cargo run --release -p trapfalld -- --db trapfall.db serve --listen 0.0.0.0:3000
Next Steps
- Create additional projects for different apps/services
- Configure alerts for webhook notifications
- Secure your deployment for production